Want to make your own chocolates at home but don’t have the budget or space for a lot of equipment? While I recommend gradually collecting the equipment in my Home Confectioner’s Complete Equipment Checklist as you advance through your confectionary journey, I also understand the need for just getting down to the bare essentials.
With a minimum collection of the below tools, you will confidently be able to produce professional-grade chocolates in your very own kitchen.
I ONLY recommend products that I have purchased and use myself, and include links to the exact items in my own kitchen, where applicable. For instance, you will find the below equipment throughout my videos and on social media.
Kitchen Equipment (with Easy Alternatives)
- Stainless steel bowls — I just looked into getting a Restaurant Depot-sized quantity of stainless steel bowls in various sizes– that’s how important these things are! Stainless steel absorbs and retains heat better than glass or plastic, making this a crucial purchase to make hand-tempering that much easier on yourself.
You can also use these bowls with a double-boiler, when you’re working with variously-sized batches (especially larger ones!), or when you’re working with centers like caramel that need a durable vessel to help cool.
And if that weren’t enough, they are just an fundamental, versatile kitchen tool to have on hand, even just for everyday cooking. - Rubber spatulas — I have two sets of spatulas since they are imperative when melting or tempering chocolate. As chocolate cools, it begins to set, and any set chocolate that remains on the sides of the bowl can throw off your temper or cause lumps of solid chocolate in your bon bons.
To avoid either of the above issues, invest in rubber spatulas that scrape and conform to the edge of the bowl, keeping your chocolate cohesive, reducing waste, and maintaining an even, silky texture throughout. - Microwave-safe bowl(s) — if you don’t have a access to a double-boiler, you will need to melt the chocolate in the microwave instead. Having bowls in various sizes gives you the flexibility to work with different batch sizes — melt as much or as little as you need.
While professional confectioners opt for plastic bowls since they don’t get hot in the microwave, I have had great success with simply reusing the same cereal bowls I already have at home. Pick whichever type works best for you. - Butter knife/parchment paper — while confectioners opt to use offset spatulas for testing their chocolate’s temper, you can just as easily dip the end of a butter knife or small pieces of parchment paper and set aside.
However, as you become more advanced in your confectionary journey, offset spatulas will become your next kitchen staple for their versatility in working with spreading fillings for enrobing, frosting chocolate cakes, or evenly spreading brownie brittle - Infra-red food-grade thermometer — you will find most chocolatiers work with an infrared thermometer for it’s pinpoint-accuracy in just a few moments, but any probe thermometer will work just as well. Plus, you can use a probe thermometer to make caramels and other delicious bon bon fillings without fear!
Confectionary Equipment
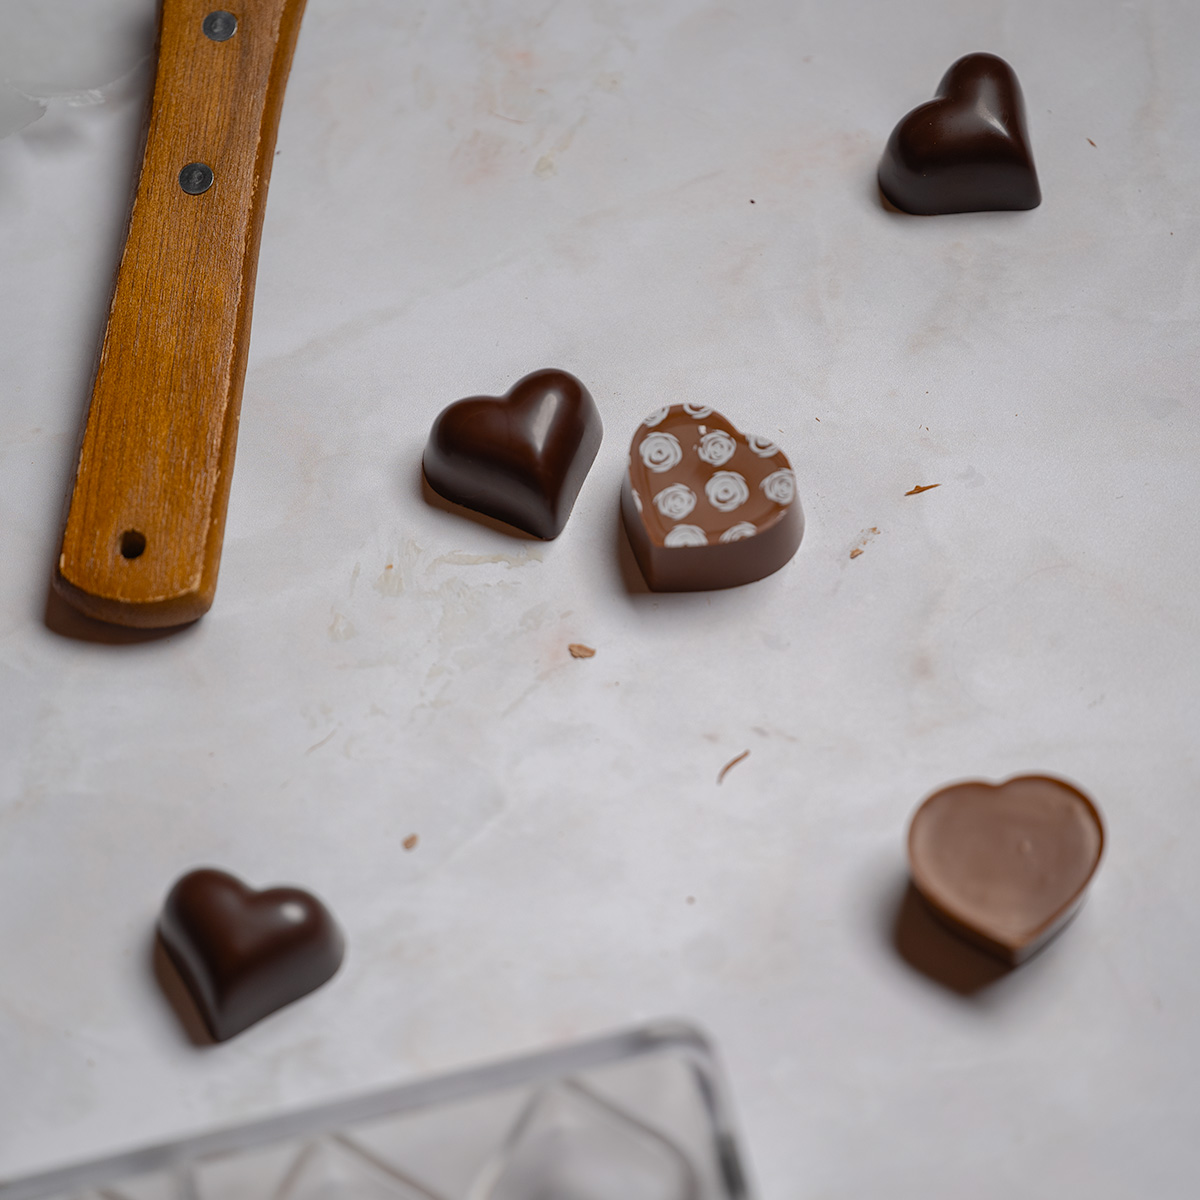
- Polycarbonate chocolate molds — while there are several different types of chocolate molds, with each one giving you varying results, ALL professional chocolatiers and confectioners use polycarbonate molds.
Affordable, flexible, easy to work with, and coming in literally thousands of different shapes, polycarbonate molds are what I recommend to anyone looking to make perfect chocolates. Plus, their material provides a superior shine to tempered chocolate even without additional cocoa butter — a chocolate shop secret. 😉 - Chocolate scrapers — I have three of these, and I recommend getting at least that many if you are working with a few different types of chocolate or fillings, which is a common scenario. Otherwise, you will have to pause to properly wipe off your spatula to create unblemished chocolates
- Piping bags — I’d recommend two sizes: these smaller bags for light batches or for substituting a paper cone, and extra-large bags for when you’re not here to P-L-A-Y. Ultimately, if you had to pick only one, go with the extra-large bags, as they will make filling molds so much easier and faster.
I have been, and will continue to be for the foreseeable future, a home confectioner. I understand your struggles, your questions, and your confusion, for I’m right there in the trenches with you in this very mysterious world of chocolate. I want you to always feel empowered that these are the very same tools I used with much success, and I hope they serve you just as well.