jerseygirlbagelshop.com

  • Recipes
  • About

Chocolate Caramel Apples

November 11, 2025 by Abigail Leave a Comment

An assortment of chocolate caramel apples.

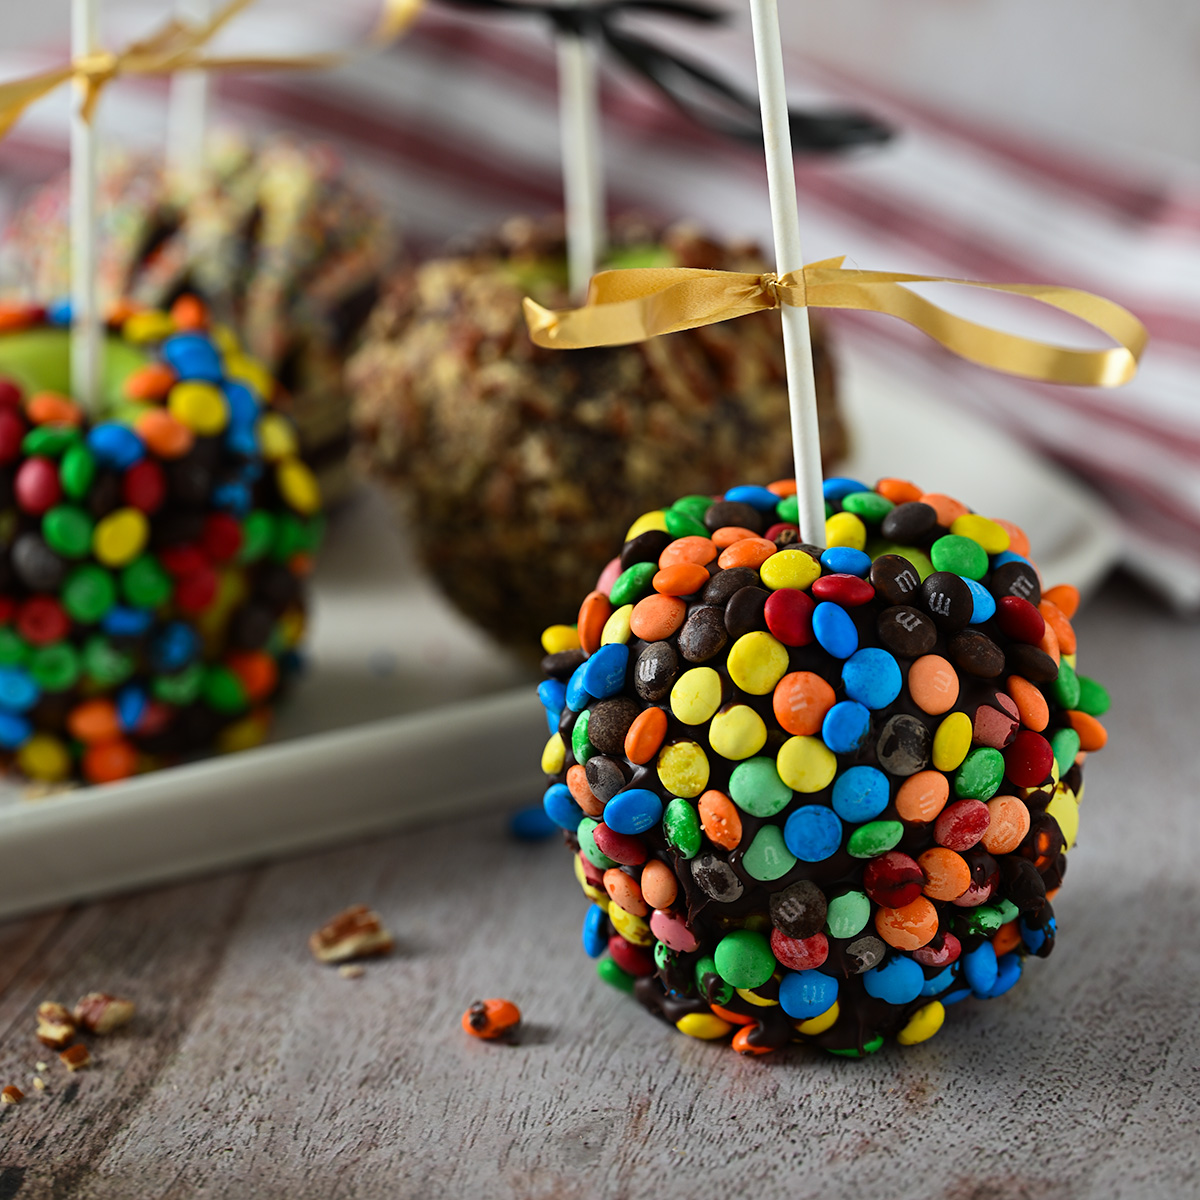
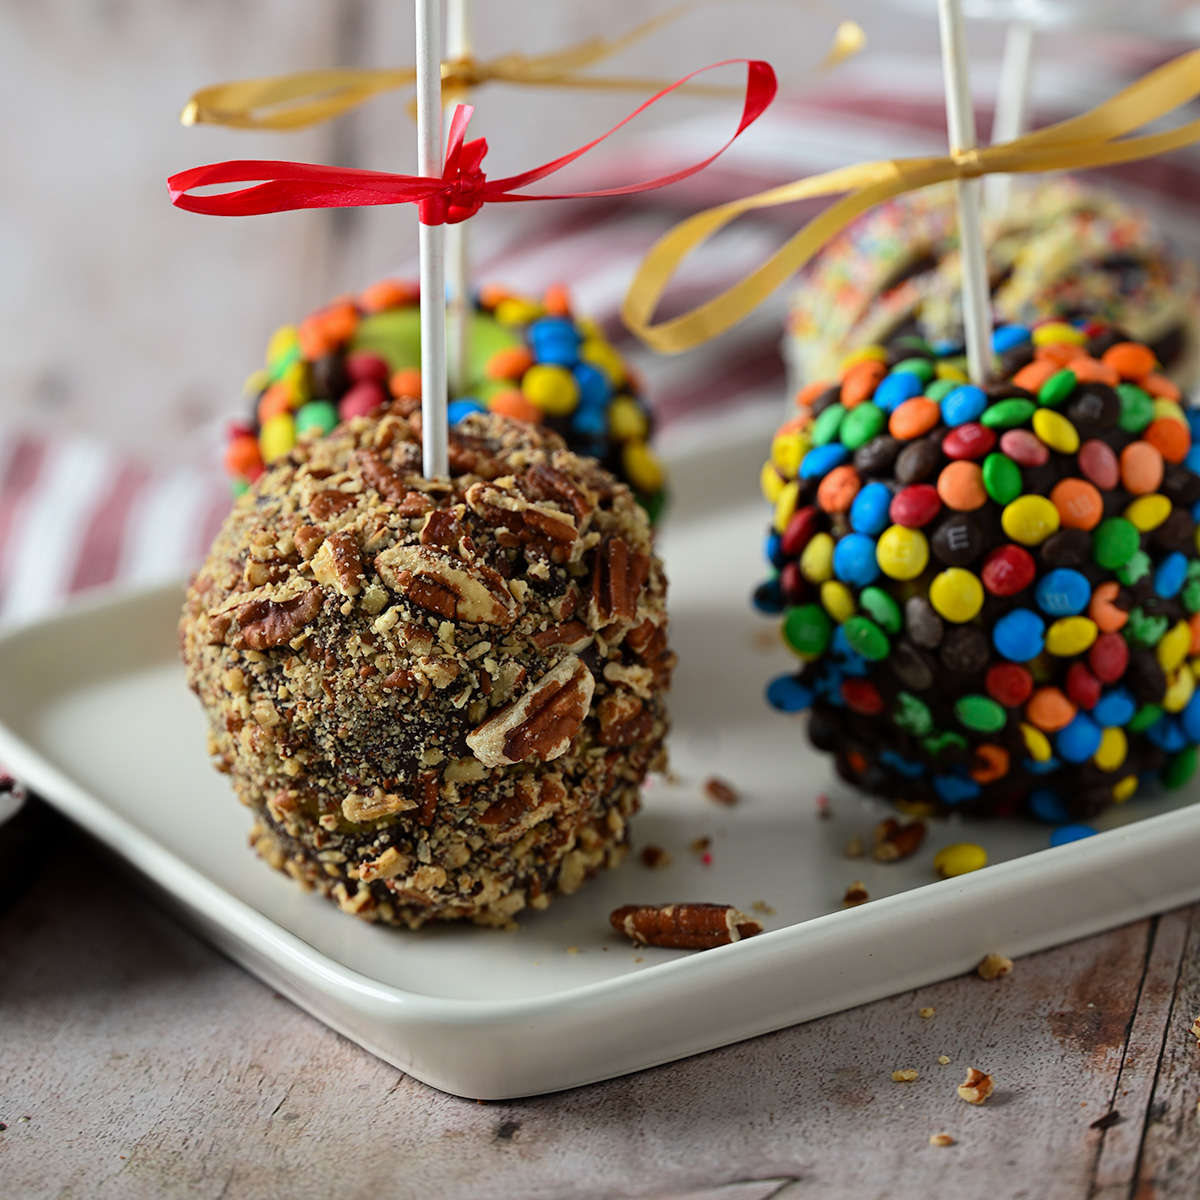
A classic fair and holiday treat! Crisp Granny Smith apples first dipped in homemade caramel and then enrobed in premium chocolate. Roll each apple in your favorite toppings like nuts, candies, or sprinkles, or drizzle chocolate or caramel overtop for an professional finish.

An assortment of chocolate caramel apples.

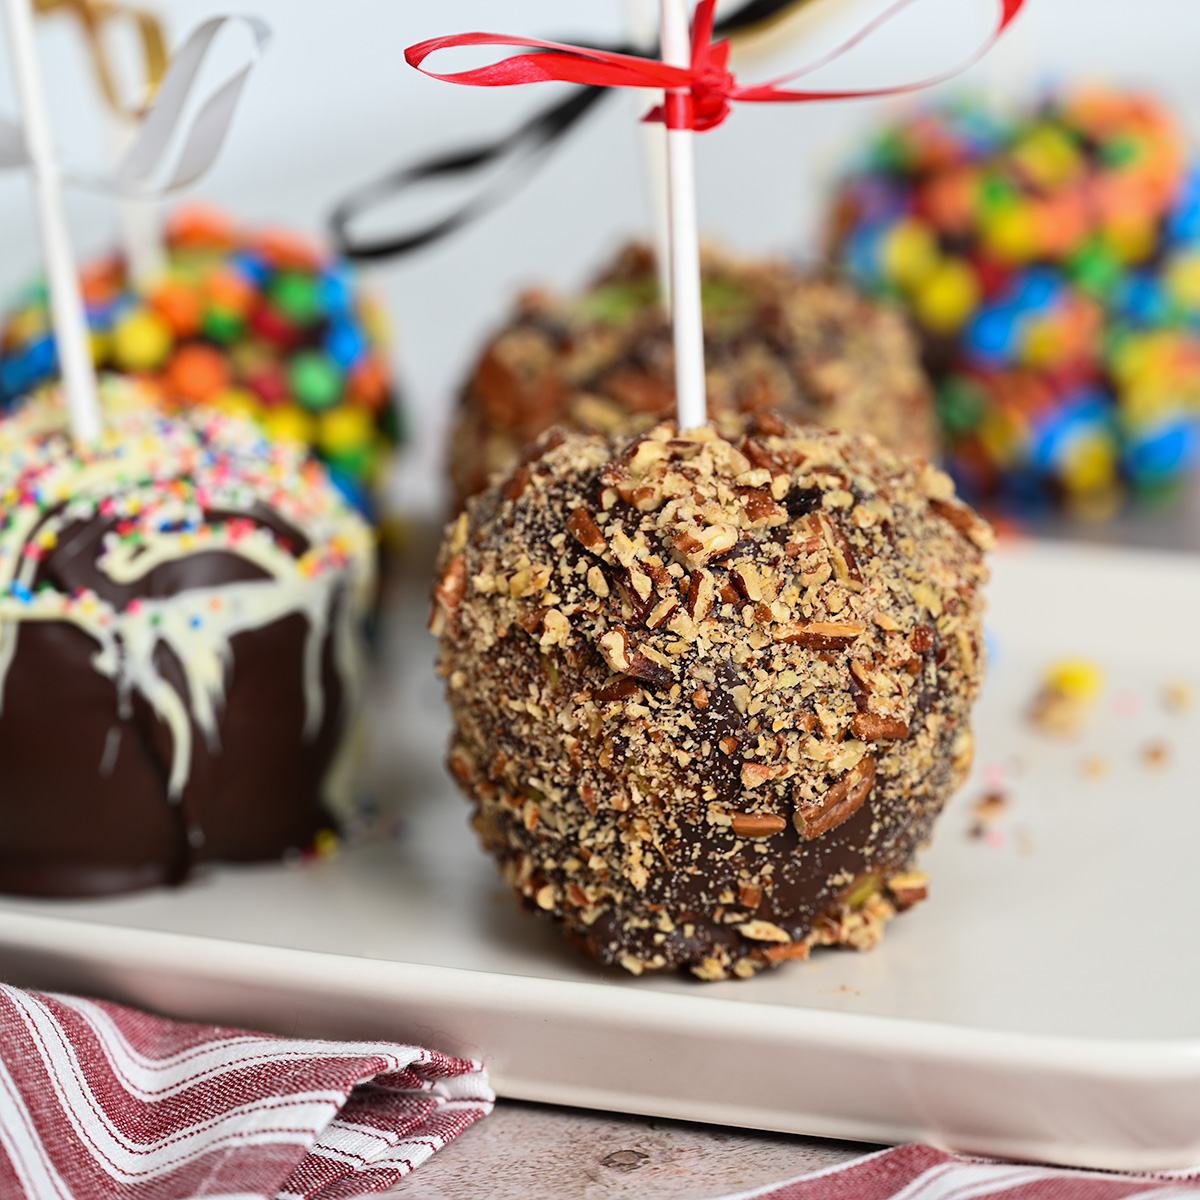
Whether you are at the summer fair, around a fall campfire, or in the throes of the holidays, one delicious snack holds steadfast throughout the seasons: the caramel apple.

Deliciously tart, followed by the nutty sweetness of homemade caramel, and finished with a bold dose of chocolate and crunchy toppings; I can’t think of any occasion that couldn’t be improved by these fun, nostalgic treats.

Food Safety

Since there have been a couple of outbreaks of foodborne illness related to listeria and caramel apples over the years, I wanted to include a few notes on food safety and the risks involved with preparing, storing, and eating caramel apples.

For more information on food safety regarding caramel apples and the related risk of Listeria, refer to the University of Minnesota, the CDC, or other sources so you can make the best informed decision for you and your circumstances.

The risk: Listeria monocytogenes (aka, Listeria) can grow rapidly in the space between the apple’s surface and the caramel layer. Storing caramel apples at room temperature, rather than refrigerating them, causes Listeria to grow more rapidly. Additionally, penetrating the apple with a stick introduces more moisture, allowing for bacteria to grow, and now with a pathway directly into the fruit itself.

Precautionary steps: thoroughly washing the apples before consumption and storing the apples for 1-3 days in the fridge will greatly reduce your risk of foodborne illness. And while not required, choosing to eliminate the candy stick is another preventative measure you can explore.

M&Ms chocolate caramel apple.

How to Eat Caramel Apples

For the ambitious eater who shamelessly abandons public dining decorum, take a page out of Guy Fieri’s book: tilt your head, unhinge your jaw, and take as big of a bite out of the whole apple as you can. Let any crumbs or toppings fall where they may on the battlefield.

But for the more bashful, simply cut a chocolate caramel apple into slices like you would any other apple, either with an apple corer or with a large knife. For slicing, cut around the core (making four large pieces total), and then cut those pieces in half to create picturesque wedges.

Why Chocolate Lovers make This Recipe

  • Made from scratch — this homemade recipe grants you the opportunity to use high-quality, simple ingredients, rather than chocolate compound and caramel containing high-fructose corn syrup like many commercial caramel apple products.
  • Affordable alternative — I did the math, and I can make 5 POUNDS (roughly 4.4kg) of chocolate caramel apples at home for the price of only 3 or 4 individual store-bought apples. So go ahead, keep scrolling to the recipe.
  • Insanely fun to make — I didn’t anticipate how much fun I’d actually have hand-dipping and decorating each apple, but each one soon became a blank canvas for different candy coatings, drizzle patterns, and sprinkles. Make apple dipping and decorating a fun, new tradition with your kids, friends, or significant other every year.
Pecan and M&M chocolate caramel apples.

Ingredients and Variations

You would be surprised to discover just how fun and easy it is to make chocolate caramel apples! A notes on a few ingredients:

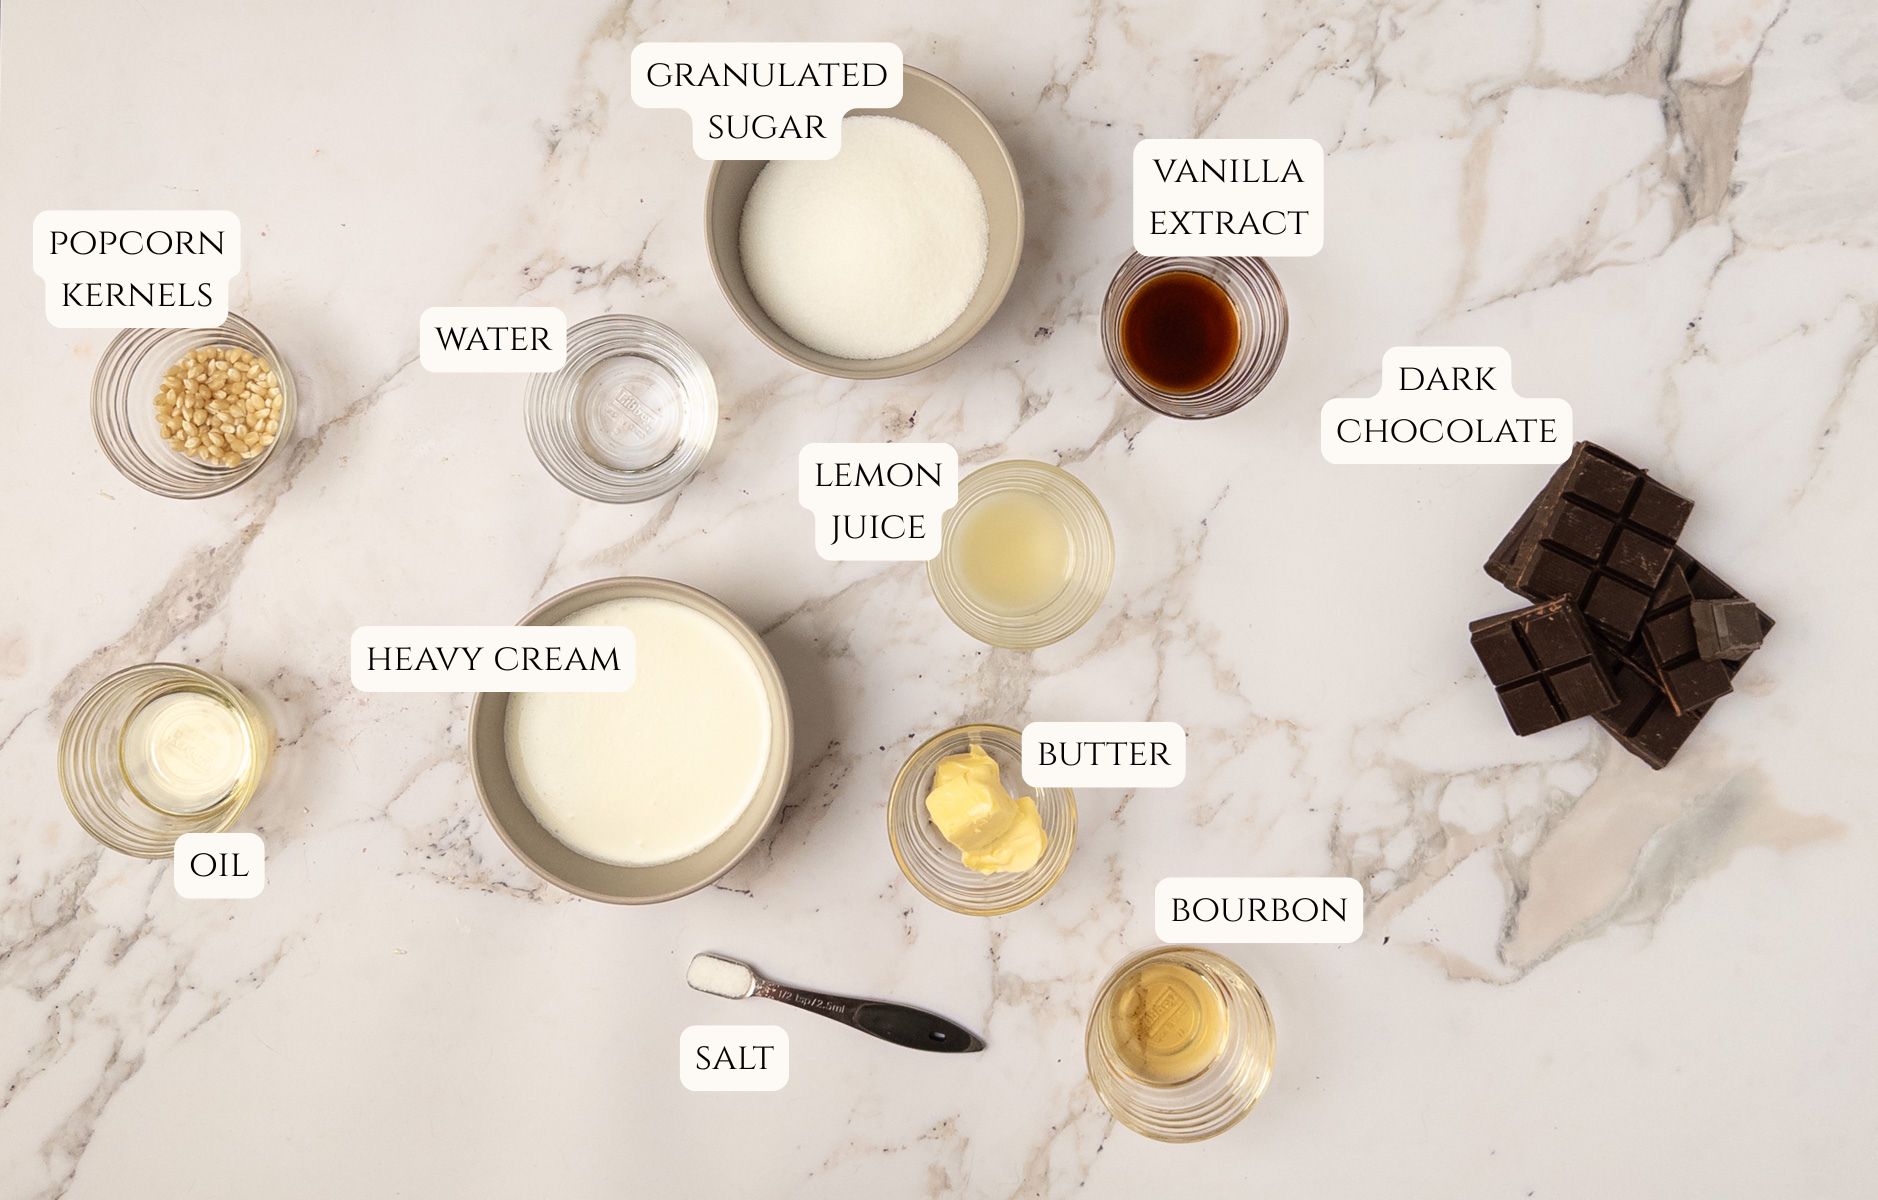
Granny Smith apples — for the ultimate flavor contrast, I adore using tart apples like Granny Smiths that perfectly balance the sweetness from the caramel and richness from the chocolate and candy toppings. However, you can also use Honeycrisp apples for a more mild profile.

Heavy cream — heavy cream’s 36% milk fat content is largely responsible for caramel’s irresistibly smooth texture. I don’t recommend substituting for whole milk or another dairy substitute, since the result will be too thin to properly dip and adhere to the apple.

Granulated sugar — white sugar is one of the main ingredients to every caramel recipe. No substitutions here, and especially not with brown sugar (unless you’re looking for toffee instead of caramel!)

Lemon juice — if you choose to use apple slices instead of whole apples on a stick, then rubbing the flesh of the fruit with lemon juice will prevent the apples from oxidizing. Otherwise, the acid in lemon juice naturally prevents large, crunchy crystals forming in the caramel, making this a foolproof tip for your baking and confectionary arsenal.

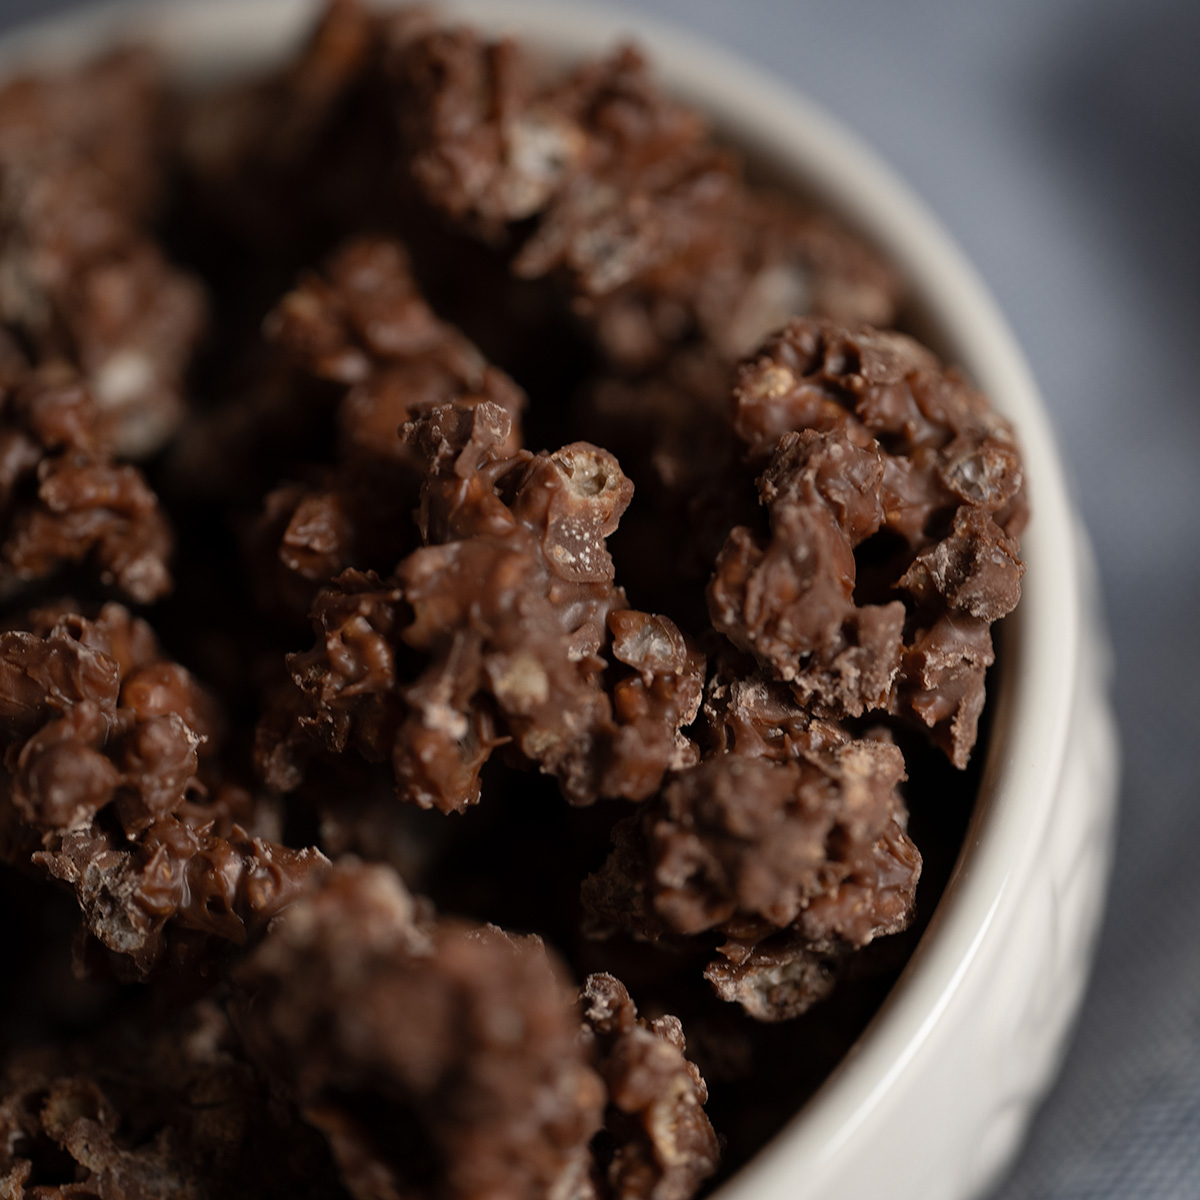
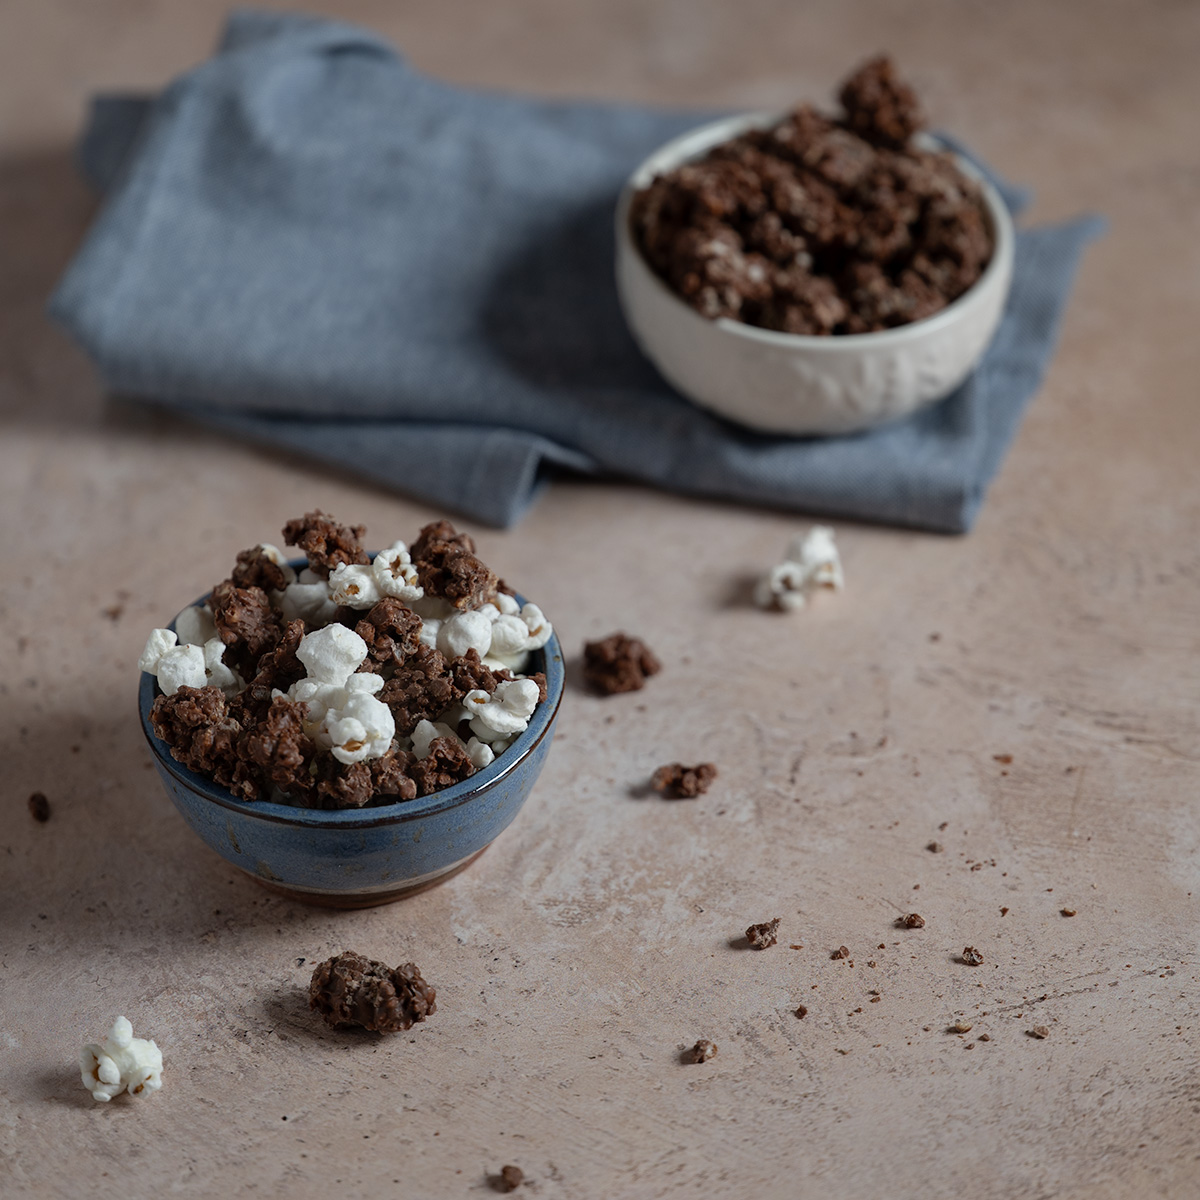
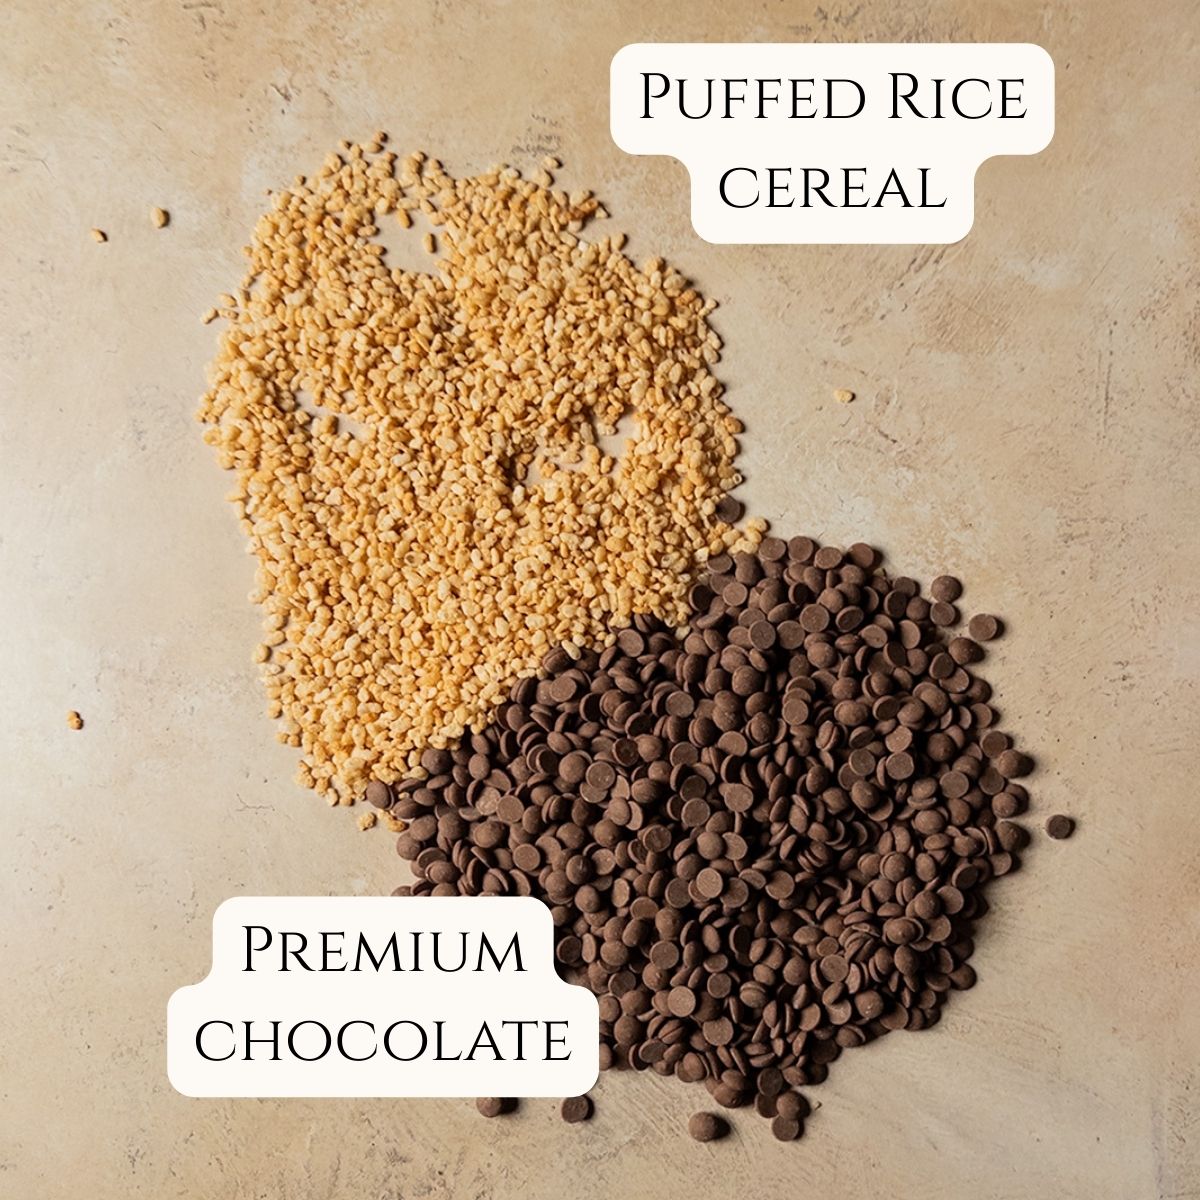
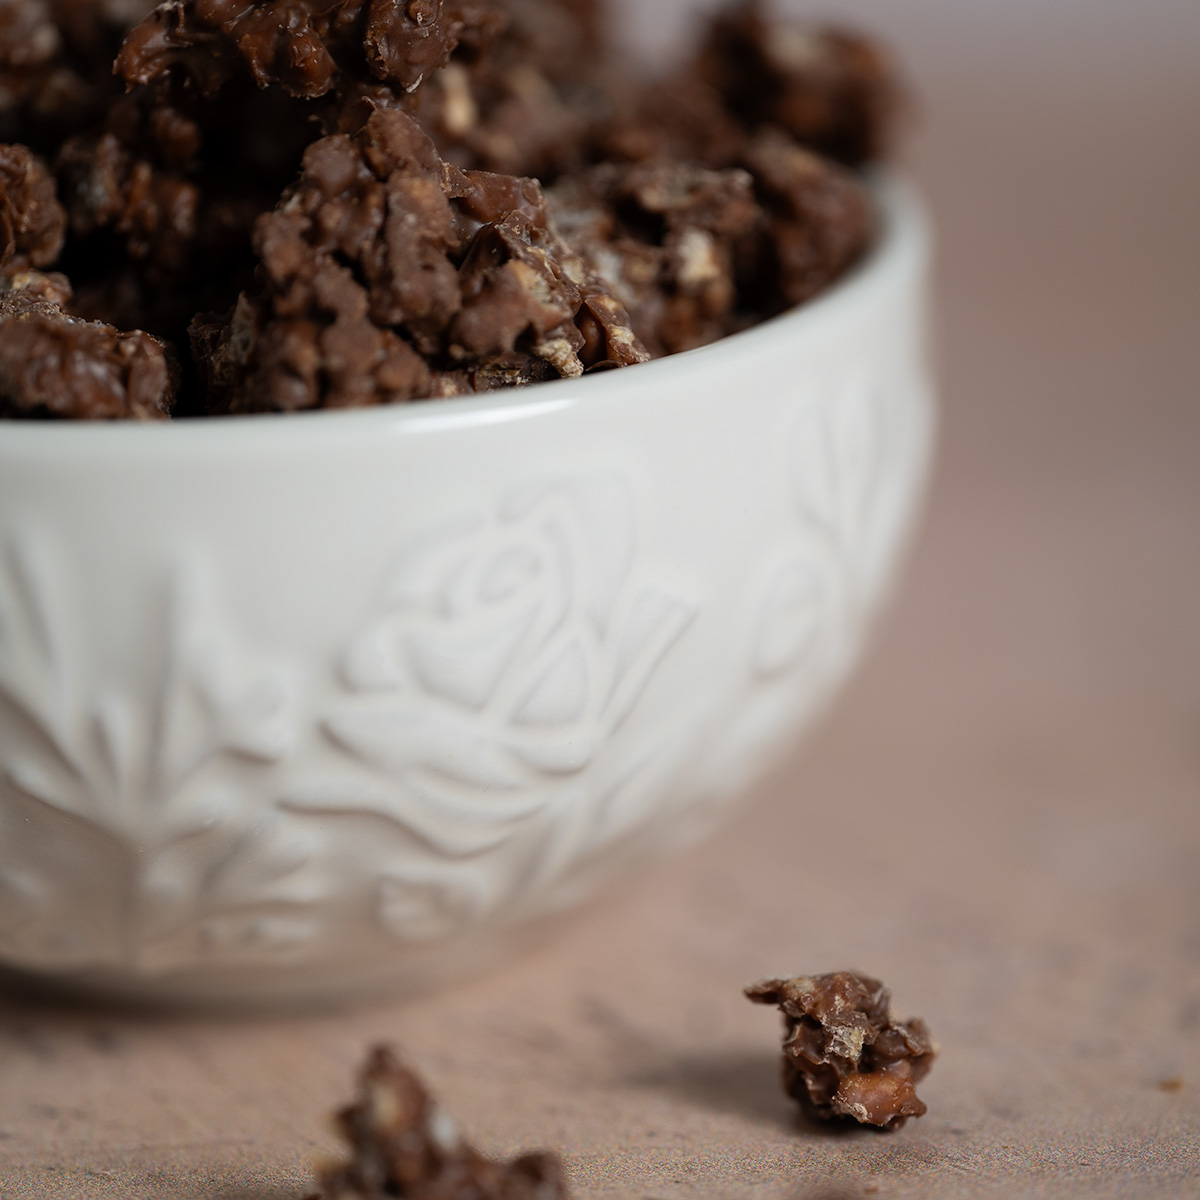
Premium chocolate — you would be dismayed in discovering that many commercially-available caramel apples are made with compound chocolate that contain vegetable and/or seed oils instead of cocoa butter.

Tips for Success

  1. See the section on Food Safety above to address any concerns with foodborne illness before proceeding with this recipe.
  2. Choose a saucepan that has a light-colored bottom, such as stainless steel, so you can easily monitor the caramel’s color as it browns.
  3. Using citric acid and a saucepan with a clear lid prevents crunchy sugar crystals from developing in your caramel, so follow the recipe as written to remove any guesswork while achieving the results you want.
  4. It takes a good few minutes for the sugar mixture to darken, so have patience and trust in the process. Most importantly, refrain from stirring the caramel until the cream is added, otherwise your caramel will come out with large crystals that will be unpleasant to eat.
  5. Once the sugar mixture begins to caramelize and turn a light golden brown, stay close and have the heavy cream and vanilla mixture at the ready. Sugar will darken rapidly once it starts to turn, and can go from delicious to burnt in seconds. Use your eyes and nose to determine how the caramel is progressing, and add the heavy cream as soon as the caramel reaches a dark amber color and has a rich, nutty aroma.
  6. Use either a food-grade infrared or candy thermometer to achieve the proper caramel consistency; once returned to the stovetop, the caramel should reach between 235-245 degrees Fahrenheit before setting aside to cool.
  7. Prepare a baking sheet with parchment paper lightly coated in nonstick cooking spray to prevent the caramel coated apples from sticking.
A group of chocolate caramel apples.

Storage Instructions

Store candied apples in the fridge for 1-3 days (see the section on Food Safety for more information on risks and preventative measures so you can stay happy and well this season).

Chocolate Caramel Apple

A Fall and holiday treat! Crisp Granny Smith apples first dipped in homemade caramel and then enrobed in premium chocolate. Roll each apple in your favorite toppings like nuts, candies, or sprinkles, or drizzle chocolate or caramel overtop for an professional finish.

  • measuring cup
  • candy sticks
  • 2L saucepan with clear lid
  • wooden spatula or spoon
  • food-grade thermometer
  • microwave-safe bowl
  • rubber spatula
  • baking sheet
  • sheet parchment paper
  • 230 ml heavy cream
  • 2 teaspoons vanilla extract
  • 6 Granny Smith apples, washed and dried
  • 700 grams granulated sugar
  • 400 ml water
  • 1 1/2 teaspoons lemon juice
  • 1/4 teaspoon salt
  • 10 ounces premium chocolate, chopped
  • various toppings (optional)

Preparing the Apples

  1. If desired, remove the stem from each apple and instead insert a candy stick. Otherwise, cut the apple into slices and apply a little extra lemon juice to the flesh of the fruit to prevent browning (oxidation). Set aside.

Making the Caramel

  1. In a measuring cup, stir to combine the heavy cream and vanilla extract. Set aside.

  2. In a deep saucepan with a clear lid, combine the granulated sugar, water, and lemon juice. Turn the heat to medium, cover, and allow the pan to sit undisturbed until the mixture turns a light brown, 7-10 minutes. Monitor closely until the sugar mixture turns a dark amber color.

  3. Remove the pan from the heat and add a splash of the heavy cream mixture into the caramel, stirring vigorously until the bubbles subside. Repeat 3-4 times before adding the remaining amount of heavy cream all at once. Sprinkle in the salt and stir until the mixture becomes smooth and uniform in color.

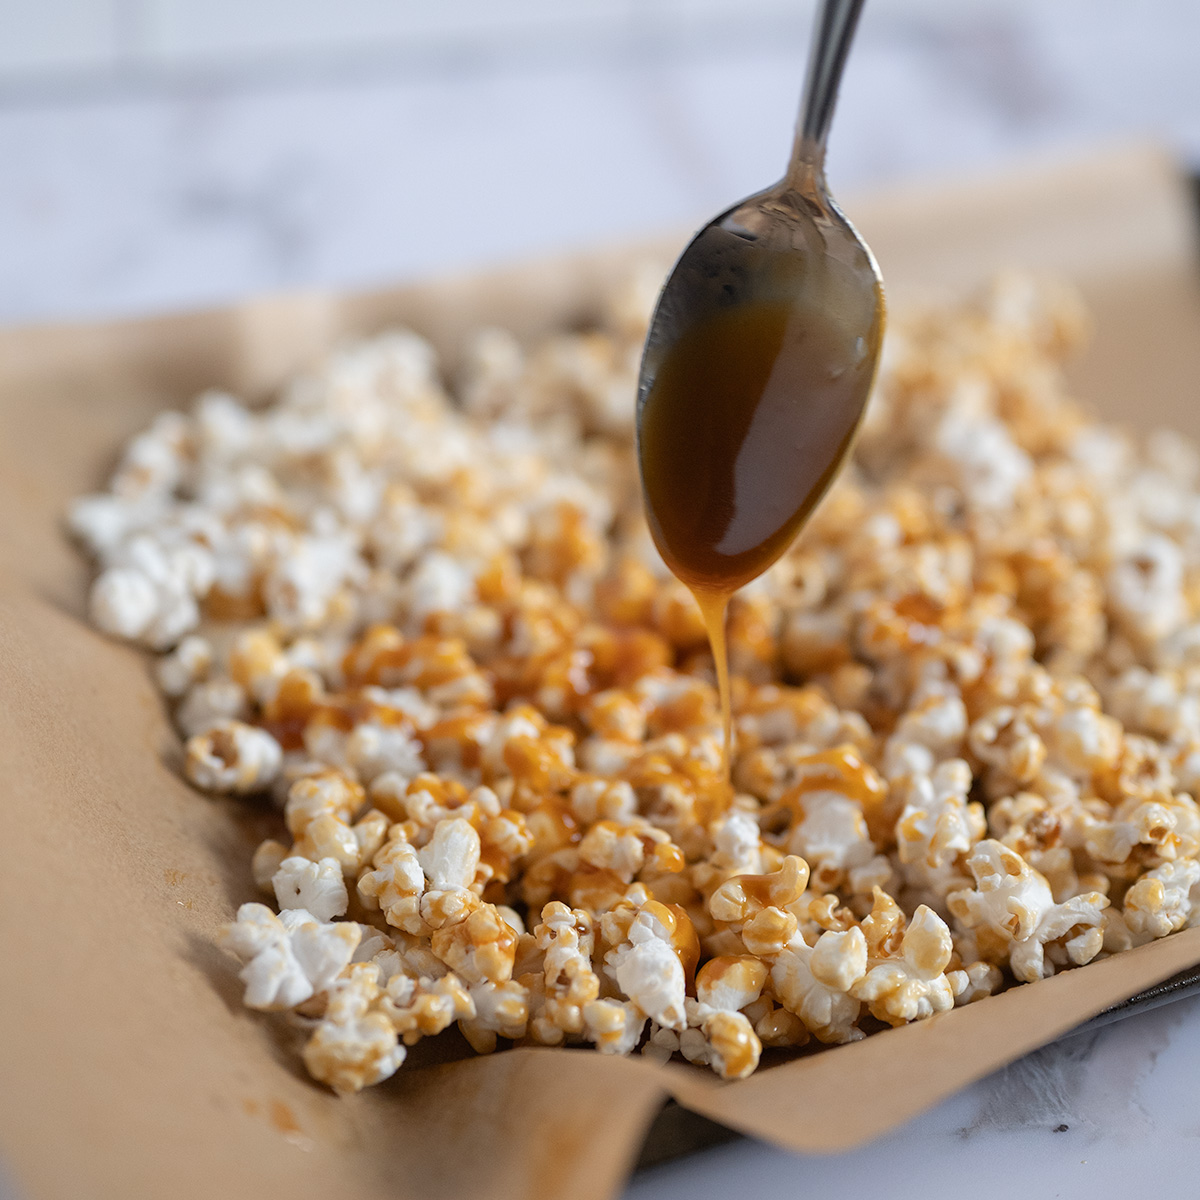
  4. Return the pan to the stove, this time on low heat, and allow the mixture to simmer, stirring occasionally, until a food-grade thermometer registers between 235-245℉. Set the pan aside to allow the caramel to cool.

Caramel Apple Assembly

  1. Once the caramel has cooled to around 200℉, dip the entire apple by the stick until all but the very top is submerged. If not using a stick, hand-dip half of the slices in the caramel, scraping any excess off the side of the bowl. Set coated apples on a prepared baking sheet and chill in fridge until firm., about 20 minutes.

  2. In a microwave-safe bowl, gently melt the chocolate in 30-second intervals on 50% power, stirring in between, until fully melted. Dip the whole apple (or half-dip apple slices) in the chocolate, again scraping any excess off the side of the bowl, before arranging on the baking sheet. Allow the chocolate to set for 3-4 minutes before rolling in desired toppings. If garnishing with a chocolate drizzle, allow the chocolate coating to fully set before applying the drizzle. Serve immediately and store leftovers in the fridge.

Snack

Filed Under: Chocolate Confections, Chocolate Snacks

Puppy Chow (Muddy Buddies)

June 14, 2025 by Abigail Leave a Comment

Muddy Buddies served with other snacks.

The Midwest classic you’ll be chain-snacking. Cool, sweet powdered sugar morphs into chocolate and peanut butter goodness and finished with the satisfying crunch of Chex cereal. Yeah, you’ll need to make this one in bulk.

Muddy Buddies served with other snacks.

If you can’t eat just one potato chip, then say hello to the snack that you literally can’t eat just one handful of without needing seconds.

Puppy Chow (also called “Muddy Buddies”) is a treasure from the American Midwest that upgraded Chex cereal to it’s finest potential: lovingly enrobed in chocolate and peanut butter and then doused in clouds of powdered sugar.

Sheer. Perfection.

And for a festive twist to serve at your next Christmas party, check out my Reindeer Chow for even more added chocolate!

Muddy buddies in a bowl.

Reasons Why Chocolate Lovers Make This Recipe

  • Ready in minutes — with just four ingredients and a microwave, you can make a big batch of Puppy Chow in preparation for those impromptu snack cravings.
  • Timeless pairing — do you ever really need an excuse to eat chocolate and peanut butter together? Plus, if you use dark chocolate, you get added heart-healthy benefits from both ingredients.
  • Great for all ages — this recipe is great if you need a new snack idea to pack for the kids or a unique snack for your next get-together with friends or family.
Muddy Buddies in a ramekin.

Ingredients and Variations

Puppy Chow is one of the easiest chocolate snacks to make, comprising of just 4 ingredients:

Ingredients for puppy chow.

Chex cereal — while I use Rice Chex for this recipe, you can experiment with other varieties as well. Since Chex is the base of this recipe, pick a flavor that you not only like, but also won’t clash with the peanut butter or chocolate.

Premium milk or dark chocolate — If you don’t have any chocolate bars on hand, you can easily substitute with melting chocolate chips.

Creamy peanut butter — creamy peanut butter easily coats the cereal and maintains the smoothness of Puppy Chow’s final texture. If you don’t have creamy peanut butter, you can use the crunchy kind instead, but note that this will alter the texture. Alternatively, if you don’t like peanut butter, you can simply omit it, or perhaps substitute it with another nut butter or even hazelnut spread!

Powdered sugar — you can never have enough powdered sugar, in my opinion, so I use a generous amount in this recipe so the cereal is completely coated. However, you can experiment with the amount you use based on your personal preferences.

Tips for Success

  1. I strongly suggest to use the suggested iterative approach when coating the Chex in the chocolate peanut butter mixture, otherwise you risk an uneven finish, with some cereal pieces even having entire bare spots.
  2. Using a resealable bag is a far cleaner method when coating with powdered sugar as opposed to adding directly to the mixing bowl.
Muddy buddies with M&Ms.

Storage Instructions

Store leftovers (if there are any!) in either a resealable bag or airtight container. Keep in a cool, dry place.

Puppy Chow (Muddy Buddies)

The Midwest classic you'll be chain-snacking. Cool, sweet powdered sugar morphs into chocolate and peanut butter goodness and finished with the satisfying crunch of Chex cereal. Yeah, you'll need to make this one in bulk.

  • large mixing bowl
  • microwave-safe bowl
  • rubber spatula
  • gallon-sized resealable bag
  • 8 ounces premium chocolate or chocolate chips
  • 4 ounces creamy peanut butter
  • 250 grams Rice Chex cereal
  • 300 grams powdered sugar
  1. Microwave the chocolate in 30-second intervals, stirring in between, until fully melted. Stir in the peanut butter until fully combined.

  2. Pour the Chex cereal into a large mixing bowl and iteratively drizzle a few tablespoons of the chocolate mixture overtop, then toss the cereal with the spoon to coat. Repeat until the cereal is fully coated.

  3. Scoop the cereal mixture into a gallon-sized resealable bag and sprinkle the powdered sugar overtop. Seal the bag and vigorously shake to coat.

Filed Under: Chocolate Snacks

S’mores Dip

June 13, 2025 by Abigail Leave a Comment

A cast iron skillet of s'mores dip with graham crackers and pretzels.

Hershey’s milk chocolate melts down into a creamy ganache and topped with toasted marshmallows. Dip graham crackers, pretzels, fresh fruit, or any other of your favorite snacks for a delicious fall treat you and your friends will devour in one sitting!

A cast iron skillet of s'mores dip with graham crackers and pretzels.

When you don’t quite feel like preparing the fire pit outside or if the weather has foiled your outdoor party plans, get creative with a tasty alternative: s’mores dip.

My version avoids two common pitfalls that you might have encountered with other recipes: the chocolate is melted separately for more controlled heating to prevent scorching, and the chocolate is converted to a thin ganache so it remains melted for longer and better coats the graham crackers. Observe:

The creamy, melted ganache made from Hershey's chocolate in s'mores dip.

If you’re in need of more delicious s’mores alternatives, my S’mores Brownies and S’mores Charcuterie Board are guaranteed to wow your next crowd.

Reasons Why Chocolate Lovers Make This Recipe

  • Easy and delicious — this dip is ready in 5 minutes and is bursting with chocolate flavor. How many other bulk recipes fit for a crowd check off those boxes?
  • Great for all ages — both kids and adults alike can help prepare and devour this dip at your next party or barbecue.
  • For all occasions — not only is this dip great to serve around a campfire, but also when the outdoors isn’t being so cooperative and you have to move the party indoors. Serve directly on the table and have everyone gather around and dip their favorite treats.
Melted marshmallows in s'mores dip.

Ingredients and Variations

This dish comes together in just 5 minutes and needs just 3 main ingredients, with your choice of dippables for serving! A few notes below:

Ingredients for s'mores dip.

Hershey’s chocolate — to maintain that classic, nostalgic s’mores taste, use Hershey’s milk chocolate as the base for this dip. However, you can easily customize this dish to your tastes and preferences: use whatever type of brand of chocolate you prefer, or maybe use white or dark chocolate instead!

Milk or heavy cream — to maintain the chocolate’s creamy consistency that’s excellent for dipping, whisk in either milk or heavy cream to the melted chocolate. You can use any type of milk you prefer, including non-dairy substitutes, but note that this might thin the chocolate’s consistency as opposed to using whole milk or heavy cream.

Marshmallows — while I used the mini variety in this dip, you can substitute any size marshmallows you have on hand. You can also substitute marshmallow fluff for a vegetarian-friendly option, or use flavored marshmallows to create a unique twist.

Graham crackers — you simply can’t have s’mores without some kind of graham cracker component! Break the crackers in half of quarters for bite-sized dipping, or swap out for cookies, tea biscuits, pretzels, fresh fruit, or anything else you can dip in chocolate!


Tips for Success

  1. It won’t seem like the milk (or heavy cream, if using) will incorporate into the melted chocolate at first, but as with any ganache, continue to whisk the mixture constantly directly in the skillet until it comes together in a smooth, silky sauce.
  2. While other recipes melt the chocolate and marshmallows together in one bake, this recipe actually has you melt the chocolate in a microwave-safe bowl in 30-second increments. This method is deliberate to avoid the risk of accidentally scorching the chocolate in the oven. Melting it separately gives you complete control over its temperature and final consistency.
  3. As you may have guessed from the above steps, the oven is mainly used to gently toast the marshmallows to a golden brown. Broil in the oven for 1-2 minutes, and keep a close watch so the marshmallows don’t burn!
Chocolate and honey graham crackers around s'mores dip.

Storage and Reheating Instructions

For the freshest taste and texture, s’mores dip should be prepared as-needed, as the chocolate ganache will need to be refrigerated, thus compromising the marshmallows’ texture. However, I’ve not known of anyone who needed to worry about leftovers. 😉

If you are unsure of how much s’mores dip to make, you can easily convert this recipe into individual portions with smaller cast iron skillets or baking pans.

S’mores Dip

Hershey’s milk chocolate melts down into a creamy ganache and topped with toasted marshmallows. Dip graham crackers, pretzels, fresh fruit, or any other of your favorite snacks for a delicious fall treat you and your friends will devour in one sitting!

  • 12" cast iron skillet
  • microwave-safe bowl
  • rubber spatula
  • measuring cup
  • whisk
  • 16 ounces Hershey's milk chocolate
  • 8 ounces whole milk or heavy cream
  • 10.5 ounces mini marshmallows
  • graham crackers, pretzels, cookies, fruit, etc., as needed
  1. Set your oven’s broil to low or preheat between 450-500F. In a microwave-safe bowl, melt the chocolate in 30-second intervals, stirring in between, until fully melted. Pour the chocolate into a seasoned cast iron skillet.

  2. Whisk in the milk or heavy cream until a smooth, homogenous ganache forms, about 1-3 minutes.

  3. Scatter the marshmallows all over the chocolate ganache and broil for 1-2 minutes, or until the marshmallows reach a deep golden brown. Serve immediately with graham crackers, pretzels, fresh fruit, or other family favorites.

Dessert, Snack

Filed Under: Chocolate Snacks

S’mores “Charcuterie” Board

June 12, 2025 by Abigail Leave a Comment

The full s'mores charcuterie board, piled high with graham crackers, chocolate, marshmallows, cookies, candies, and spreads.

An elevated twist to the campfire classic! A creative array of chocolate, crackers, cookies, candies, spreads, and other goodies artfully arranged on a large charcuterie board. Your guests will soon request that this become a tradition for them to enjoy throughout the year.

The full s'mores charcuterie board, piled high with graham crackers, chocolate, marshmallows, cookies, candies, and spreads.

Originally, “charcuterie boards” are French assortments of various meats, a dish that has since been adapted to also include cheese, fresh fruits, crackers, and other tasty snacks.

This recipe takes this concept a step further by making it a dedicated dessert board brimming with colorful candies and chocolates that are sure to excite any party guest.

Of course, you should carve out a section dedicated to the standard s’mores accoutrement: graham crackers, Hershey’s chocolate, and marshmallows. But beyond these staples, let your imagination run wild with possibilities, or reference my suggestions in “Ingredients and Variations” below.

If you’re also in need of more s’mores recipes, then my S’mores Brownies and S’mores Dip might make perfect additions to your overall spread.

Chocolate spread and graham crackers and marshmallows on a s'mores charcuterie board.

Reasons Why Chocolate Lovers Make This Recipe

  • No-bake recipe — if you can buy it, you can make it! This charcuterie board comes together in however much time it takes for you to configure a bounty of chocolate, cracker, cookies, and other deliciousness.
  • Elevates any party — this charcuterie board is perfect for large gatherings, especially when young children are present! Other occasions include game day, birthdays, summer barbecues, or anytime you need a lot of food in a short amount of time. Plus, this board can easily be dressed up or down to fit whatever event you’re hosting or attending.
  • No creativity required — I myself am no expert on charcuterie composition, but even I put this board pictured here together in just a few minutes.
  • Eat at your leisure — there’s nothing time-sensitive about any of these ingredients (i.e., no temperature fluctuations, sauces and spreads stay creamy, etc.), leading to a delightfully fun eating experience from the first bite to the last.
M&Ms and crackers and cookies on a s'mores charcuterie board.

Ingredients and Variations

A s’mores charcuterie board requires no cooking or baking from you and can be prepared in as little as 5-10 minutes! Additional simplicity comes in the forms of flexible ingredients; select the candies and snacks you like best! Some ideas include:

S'mores charcuterie board ingredients.

Graham crackers — you can’t have s’mores anything without graham crackers! I used both the honey baked and chocolate varieties, but you can use other flavors as well.

Hershey’s chocolate — Hershey’s is the chocolate everyone pictures with s’mores, so align with tradition and have a wide selection for guests to choose from. Milk chocolate, cookies and cream, dark chocolate, and milk chocolate almond varieties are all great ideas to serve.

Marshmallows — include both jumbo and mini marshmallows for guests to pick whichever kind works best for their particular sandwich’s construction. Bonus: include some roasting sticks for those who love to eat gooey marshmallows fresh from the fire.

Cookies or biscuits — a s’mores charcuterie board is no place for a diet (unless you’re aiming for that, of course). Chocolate chip cookies, Oreos, sugar cookies, or anything those Keebler elves have baking in that tree of theirs will work wonders.

Pretzels or other salty snacks — offer a few crunchy, salty snacks for a welcome contrast that will keep your guests primed to keep on eating! 😀 Pretzels, nuts, or even certain kinds of chips will all work here.

Candies — Hershey’s kisses, M&Ms, and chocolate-covered candies are all fun additions to every board, and serve as no-fuss options for your more fastidious guests.

Fresh fruit — fruit serves as a natural palate cleanser, making it a great offering alongside sweeter options so your guests don’t get too bogged down with sugar overload. Plus, fruit can also be dipped in the various spreads for a fondue-style experience.

Various spreads — rather than solely relying on toasted marshmallows to create gooey melted chocolate, serve a charcuterie board with bowls of melted chocolate, chocolate hazelnut spread, peanut butter, or even caramel sauce.

Tips for Success

  1. Creating a charcuterie board from scratch can be a bit compositionally intimidating; it can give some that blank canvas paralysis. But fear not! Start by positioning the bowls for spreads at different points around the board, followed by grouping crackers and cookies together. From here, you can start filling in tiny gaps with marshmallows, candies, snack, and other filler items, until the board is overflowing with goodies.
  2. More is more when it comes to the quantities you should serve on a charcuterie board. Imagine your guests having to quickly ration their portions of a particular chocolate, cookie, or other ingredient early on in the night. To avoid this faux-pas, include enough of each ingredient for a multitude of guests to enjoy.
  3. Keep your guests’ eating journey in mind when constructing the board’s layout. By that, I mean proactively plan out the various desserts they can make ahead of time, and include a variety of options at once. Chocolate hazelnut spread can be used in s’mores, but can also be used to dip fruit, pretzels, or other ingredients. Create endless combinations that will keep your guests’ visual and flavor interest.
Peanut butter dip on a s'mores charcuterie board.

Storage Instructions

If you can manage it and it won’t be out for very long, wrap the entire board in cling film and store at room temperature (if no refrigerated ingredients are used, of course). Otherwise, break down the ingredients into separate containers or resealable bags and store accordingly.

S’mores “Charcuterie” Board

An elevated twist to the campfire classic! A creative array of chocolate, crackers, cookies, candies, spreads, and other goodies artfully arranged on a large charcuterie board. Your guests will soon request that this become a tradition for them to enjoy throughout the year.

  • large charcuterie board, any shape
  • ramekins
  • s'mores roasting sticks
  • 1 sleeve honey graham crackers
  • 1 sleeve chocolate graham crackers
  • 4 Hershey's chocolate bars
  • 1 Hershey's Cookies n' Cream bar
  • 2 handfuls mini marshmallows
  • 2 handfuls large marshmallows
  • 1 handful mini pretzels
  • 1 package Almond Joy or other chocolate candies
  • 1 package chocolate wafers
  • 7 ounces M&Ms or other small candies
  • 7 ounces creamy peanut butter
  • 7 ounces melted chocolate or hazelnut spread
  • 1 package breakfast biscuits
  • 1 package soft Dutch cocoa cookies
  • fresh fruit, any variety
  1. Arrange the three ramekins in a triangle on the board. Arrange the graham crackers around one ramekin. Next, create a line of solid chocolate across the board. Fill any gaps with marshmallows, cookies, biscuits, and fresh fruit. Fill ramekins with candy and spreads.

Snack

Filed Under: Chocolate Snacks

Boozy Moose Munch

April 11, 2025 by Abigail Leave a Comment

A piece of moose munch dripping with chocolate.

Sweet, crunchy, and chocolaty– this recipe has it all! Freshly-prepared popcorn enveloped in a warm, salty caramel with a gorgeous bourbon aftertaste, finished with a drizzle of decadent dark chocolate.

A piece of moose munch dripping with chocolate.

The smell of freshly-popped popcorn is practically an olfactory mating call. There’s something about that salty, buttery goodness that never fails to get peoples’ mouths watering. Now, combine that with the sweet nuttiness of homemade caramel, and the aromas in your kitchen will be otherworldly.

And that’s even before we add the dark chocolate.

This recipe demands indulgence. Don’t be stingy with either the caramel or chocolate coatings, as each bite of popcorn should contain the cool, bitter notes from the chocolate that gradually give way to the sweetness of the caramel and finishes with the warmth from the bourbon.

Simply put, this recipe is drama on every level.

Streams of dark chocolate drizzled over caramel popcorn.

What is Moose Munch?

This recipe is a boozy version of Harry and David‘s classic Moose Munch formula. The addition of bourbon accentuates both chocolate and caramel notes while creating a sophisticated aftertaste that immediately compels you to reach for another handful.

Why Chocolate Lovers Make This Recipe

  • Timeless classic — I don’t believe there will ever be a time where chocolate and caramel are a bad idea.
  • Customizable — maybe you want to use white or milk chocolate instead of dark, incorporate nuts or pretzels, or you like a boozier kick. Whatever you prefer, this recipe is forgiving enough for you to experiment and make it your own.
  • Tasty perfection — all of your snack cravings, condensed into a single recipe that ticks all of the boxes: sweet, savory, crunchy and creamy.
  • Makes a great gift — bake a big batch for a unique and elevated gift idea for family, friends, or coworkers that they will request again and again.

Ingredients

This recipe might seem complex, but uses only a handful of ingredients, all of which I guarantee you have in your pantry. Some notes on the key ingredients:

Ingredients for boozy moose munch.

Unpopped popcorn kernels — Using unpopped kernels allows for you to control the exact flavoring and sodium level of the popcorn. Coat the bottom of the pan with a flavorless oil like avocado or vegetable oil to avoid impacting the final result.

Lemon juice — add an acid like lemon juice is a professional baker’s tip and takes all of the guesswork out of preventing crystallization in your caramel.

Butter — butter adds a luxurious, velvety texture, while the touch of salt lends to a more nuanced flavor.

Bourbon — this recipe is versatile enough so that you can use whichever bourbon is your favorite. I recommend using two tablespoons for a light, boozy note, but you can increase this to three tablespoons if you prefer a stronger kick.

Caramel drizzling off of a spoon onto freshly-popped popcorn.

Tips for Success

  1. Use unpopped popcorn so you have complete control over the flavor and saltiness of the final product.
  2. As mentioned above, use an acid like lemon juice to naturally prevent your caramel from crystallizing. No more fretfully hovering over your pot of caramel, diligently brushing the sides and worrying about the final texture.
  3. While you can technically use melted chocolate for this recipe, I found that the chocolate made the popcorn soggy and it smeared all over my hands every time I touched it. To avoid this, temper the chocolate for easier handling and to preserve the popcorn’s addictive texture. Plus, tempered chocolate is more shelf-stable that melted chocolate.
  4. Add the bourbon once the caramel has fully come together. Incorporating it too early will cause the alcohol to burn off and reduce its overall potency.
A holiday tin of moose munch.

Storage Instructions

Once chocolate has fully set, store in an airtight container for two weeks.

Bourbon Moose Munch

Sweet, crunchy, and chocolaty– this recipe has it all! Freshly-prepared popcorn enveloped in a warm, salty caramel with a gorgeous bourbon aftertaste, finished with a drizzle of decadent dark chocolate.

  • high-sided, heavy-bottomed saucepans
  • large baking sheet
  • sheet parchment paper
  • tablespoons
  • wooden spoon
  • microwave-safe bowl
  • rubber spatula
  • digital thermometer

For the Popcorn

  • 1 tablespoon unpopped popcorn kernels
  • 4 tablespoons avocado or vegetable oil

For the Bourbon Caramel

  • 250 grams white granulated sugar
  • 240 ml heavy cream
  • 60 ml water
  • 2 tablespoons lemon juice
  • 56 grams salted butter
  • 1 tablespoon vanilla extract
  • 1/2 teaspoon salt
  • 2 tablespoons bourbon

For the Chocolate Drizzle

  • 12 ounces dark chocolate

For the Popcorn

  1. Drizzle avocado oil into a large, high-sided pan. add unpopped kernels and cover with continuously shake pan to help coat oil and prevent burning. once all kernels have popped, remove from heat and uncover to cool.

For the Bourbon Caramel

  1. In another heavy-bottomed, high-sided saucepan, add the sugar, water, and lemon juice and heat on medium-low. Allow to sit undistributed until the mixture starts to produce dark-tinted bubbles; about 7 minutes.

  2. Stir sugar mixture until it turns a deep amber color and registers 220 Farenheit on a candy thermometer. This temperature should be a guideline; you should constantly monitor your caramel’s appearance and smell. If it looks too dark or smells burnt, it probably is, and you will have to start over.

  3. Once the temperature is 220 Farenheit, carefully add the heavy cream and stir continuously until the bubbles settle down. Stir in the butter, salt, and vanilla extract and heat for another 1-2 minutes. Pour in the bourbon and continue to cook for 5 minutes.

  4. Preheat the oven to 250 degrees. Arrange the popcorn in a single layer on the baking tray. Bake for 45-60 minutes, stirring every 15 minutes for even cooking. Allow to cool completely on the baking tray.

  5. Line a baking sheet with parchment paper. Pour out the popcorn kernels and group them close together. Drizzle caramel over all of the kernels, covering as much surface area as possible. Grab the other tablespoon and toss the kernels and caramel until each one is completely coated. Set aside to cool.

For the Chocolate

  1. Temper the chocolate. Drizzle all over the kernels and allow to set at room temperature for 15 minutes before chilling in the fridge until set.

Snack
chocolate gift ideas, chocolate snacks

Filed Under: Chocolate Snacks

Chocolate Granola Cereal

April 2, 2025 by Abigail Leave a Comment

Chocolate granola in cereal bowls with milk and a side of fresh fruit.

That rare moment when you want to eat healthy food. Crunchy oat clusters baked together with nuts and dried fruit to a golden brown with a touch of honey for natural sweetness. Swirl around in dark chocolate to complement the warm cinnamon and nutmeg notes for the perfect year-round treat.

Chocolate granola in cereal bowls with milk and a side of fresh fruit.

I had chocolate cereal for breakfast every single morning for 25 years. Cocoa Puffs was the kingpin and yes I did taste the difference when General Mills switched to 100% whole wheat. Others included Nesquik, Cocoa Pebbles, Cocoa Krispies, Chocolate Honeycomb, Cap’n Crunch Choco Donuts, Mud n’ Bugs, Chocolate Lucky Charms…you get the point.

So when my husband pointed out to me that I was somehow–get this–too old for sugary cereal, I set out to make a nutritious yet super-chocolaty “adult” cereal. Yes, spite is a beautiful thing.

This recipe boasts a lot of health benefits: protein and healthy fats from the pepitas and almonds, antioxidants from the dark chocolate and cranberries, fiber from the oats, and healthy fats again from the coconut oil. Yet the cocoa powder, cinnamon, nutmeg, and melted dark chocolate chips make this an amazing substitute for my chocolate cereal escapades of yesteryear.

Loophole!!

Chocolate granola clusters on a baking sheet.

What is Chocolate Granola Cereal?

Granola comes together when unflavored rolled oats are coated in a melted fat, like coconut oil, and baked to create crunchy clusters. Popular add-ins can include nuts, seeds, fruit, and chocolate chips. This recipe dives into layered decadence, utilizing warm spices like cinnamon and nutmeg, honey for natural sweetness, and both cocoa powder and melted chocolate chips for intense, chocolaty goodness. Pour yourself a bowl with your choice of milk for the ultimate chocolaty start to your day.

Why Chocolate Lovers Make This Recipe

  • Suitable for any meal — this granola makes a decadent yet nutritious breakfast, a sweet addition to an afternoon yogurt dessert, or a poppable midday snack.
  • Healthy — almonds and pepitas are full of protein and healthy fats, while cranberries and dark chocolate are full of antioxidants. Indulge guilt-free!
  • Customizable — substitute your favorite nuts, seeds, dried fruit, and even the type of chocolate used. Start (or end) the day right with all of your best-loved ingredients.
  • Fits into your busy schedule — make a large batch and store in an airtight container so you have a healthy breakfast or snack whenever you need.
Close up of chocolate granola in a ramekin.

Ingredients and Variations

This chocolate granola cereal recipe is so easy in that you can swap out whatever ingredients you happen to have on hand– no pressure! However, some key ingredients include:

Ingredients for chocolate granola cereal.

Rolled oats — also called old-fashioned oats, these make up the foundation for granola. Use unflavored, unseasoned raw oats that usually come in a large canister. Instant oatmeal will NOT have the same bake time or the right texture.

Nuts and seeds — I use pepitas and chopped almonds for their mild flavor and protein-rich properties, but you can also use chia seeds, walnuts, pecans, or heck, even omit them entirely for a more intense, classic granola flavor.

Dried fruit — the advantage of using dried cranberries is that they are naturally sweet and tart and go beautifully with dark chocolate. However, you can use raisins, sultanas, or even candied fruit peels. Plus the chewiness from the fruit keeps things texturally engaging against the crunchiness from the nuts and oats.

Honey — honey helps bind the oat clusters together while also providing natural sweetness. You can also use maple syrup instead, but note that this will alter the flavor profile. Personally, I don’t like maple-flavored foods outside of pancakes, but it should be tasty nonetheless. 🙂

Coconut oil — do not omit!! Using a melted fat like coconut oil preserves the granola’s crispiness as it bakes. And don’t worry, if you’re like me and loathe the taste of coconut, this recipe uses so little oil that the flavor is barely perceptible in the final product.

Chocolate chips — while I will never slap premium chocolate out of your hand, this recipe is simple and forgiving enough that chocolate chips are all you need to enrobe each cluster in delicious chocolate.

Tips for Success

  1. For the crispiest clusters, it is imperative that you press the granola on the baking sheet to flatten into a slightly thick, single layer. Also, rotate the pan halfway through baking for even browning.
  2. The amount of melted coconut oil in this recipe has been calculated based on the ratios to the other ingredients. While it might not seem like enough when you first add it to the dry ingredients, I promise that with even stirring and folding, you can easily coat all of the granola for even baking. Using too much oil will create a soupy final product that will never crisp or come together into clusters (ask me how I know…)
  3. While not strictly necessary, blooming the cocoa powder and espresso powder together in the wet ingredients for a few minutes intensifies the flavor of both spices.
Chocolate granola on top of a blueberry yogurt parfait with diced strawberries.

Storage Instructions

Store chocolate granola cereal in a cabinet or pantry in an airtight container for up to 2 weeks.

Chocolate Granola Cereal

That rare moment when you want to eat healthy food. Crunchy oat clusters baked together with nuts and dried fruit to a golden brown with a touch of honey for natural sweetness. Swirl around in dark chocolate to complement the warm cinnamon and nutmeg notes for the perfect year-round treat.

  • mixing bowl
  • rubber spatula
  • small saucepan
  • half-baking sheet
  • sheet parchment paper
  • 150 grams rolled oats
  • 45 grams pepitas
  • 45 grams chopped salted almonds
  • 125 grams dried cranberries
  • 1/4 teaspoon ground nutmeg
  • 3-4 dashes ground cinnamon
  • 92 grams honey
  • 18 grams coconut oil
  • 30 grams unsweetened cocoa powder
  • 1/4 teaspoon espresso powder
  • 2 teaspoons vanilla extract
  • 1/8 teaspoon salt
  • 200 grams dark chocolate chips
  1. Preheat oven to 300℉. Meanwhile, add the rolled oats, pepitas, almonds, dried cranberries, ground nutmeg, and ground cinnamon to a mixing bowl and mix.

  2. In a small saucepan over medium-low heat, melt the honey and coconut oil. Once completely melted, sprinkle in the cocoa powder and espresso powder and allow them to bloom, stirring occasionally, 4-5 minutes more. Stream in the vanilla extract, stir, then remove from heat.

  3. Pour the honey mixture over the dry ingredients a little at a time, stirring in between to evenly coat. Pour the granola into a single layer on a prepared half sheet pan and firmly press flat with a spatula between 1/4-1/2" thick.

  4. Sprinkle the salt overtop and bake for 20-25 minutes, rotating the baking sheet halfway through for even doneness. Allow to cool completely on the baking sheet before breaking into small clusters.

  5. In a microwave-safe bowl, melt the chocolate chips in the microwave in 30-second intervals, stirring in between. Drizzle the chocolate all over the granola clusters, then toss with two tablespoons to fully coat each cluster. Chill in the fridge until fully set.

cereal, chocolate breakfast, chocolate snacks, fruit, granola, naturally sweetened, nuts, yogurt

Filed Under: Chocolate Breakfast, Chocolate Snacks

Homemade Buncha Crunch

March 9, 2025 by Abigail Leave a Comment

Blue bowl of Buncha Crunch with popcorn.

Bring the movie theater snack bar to your home for your next movie night! A homemade version of the popular Nestle candy, silky, tempered milk or dark chocolate combines with crisped rice and broken into bite-sized pieces for handfuls of chocolaty goodness.

Blue bowl of Buncha Crunch with popcorn.

Buncha Crunch are like potato chips: you really can’t have just one. But for fifteen years, the only way you could get your hands on this scrumptious candy was by going to the movies. That is, until Nestle finally knighted grocery stores, deeming them noble and worthy enough to carry this compelling snack.

But why settle for 8-ounce servings when you can make as much as you want, whenever you want, at home?

A macro view of Buncha Crunch clusters in a bowl.

What is Buncha Crunch?

“Buncha Crunch” is Nestle’s twist on their classic Crunch chocolate bar. Rather than an entire candy bar, Buncha Crunch are bite-sized clusters of crisped rice enrobed in milk chocolate. It is a simple yet completely addictive snack that will serve you well during your next home movie night!

Two bowls of Buncha Crunch.

Reasons to Make This Recipe Today

Only uses two ingredients — you only need crisped rice and your favorite milk chocolate bar to make this recipe.

More cost-effective — you can make at least double the amount (if not more) by making this recipe yourself versus purchasing Buncha Crunch from your local store. Further, you can skip the pricey snack bar altogether the next time you want to catch a movie.

More natural — making your own at home eliminates some of those additional preservatives in the commercial recipe.

Makes a unique gift — throw a few pieces into a goodie bag for a sweet treat for family and friends!

Ingredients

Premium milk chocolate — using premium milk chocolate offers a better texture and more chocolaty flavor than using chocolate chips or melting wafers. You can substitute with premium dark chocolate, if you prefer.

Crisped rice — you can either use Rice Krispies or generic crisped rice, either of which can be found in the cereal aisle of your local grocery store. Crisped rice is essential since this is what gives this confection its signature crunch.

A close-up of the texture of Buncha Crunch.

Tips for Success

  1. Pour the crisped rice into a bowl and then lightly crush in your hand. You want the cereal to be broken into smaller pieces, but not so much where it becomes powder. If too much powder develops, strain through a sieve to avoid a grainy texture in the final product.
  2. Add the melted chocolate gradually, stirring in between to coat. You are aiming for a 60-40 ratio of chocolate to rice, so take care not to add too much chocolate, or else risk a gloopy mess.
  3. As always, while you can get away with using melted chocolate, I highly recommend tempering the chocolate prior to adding it to the rice. I found that the melted chocolate version smeared in my hands almost immediately, even after being chilled in the fridge for a few hours (something you don’t experience with tempered chocolate). However, this is ultimately up to personal preference.

Homemade Buncha Crunch

Bring the movie theater snack bar to your home for your next movie night! A homemade version of the popular Nestle candy, silky, tempered milk or dark chocolate combines with crisped rice and broken into bite-sized pieces for handfuls of chocolaty goodness.

  • digital scale
  • baking sheet
  • sheet parchment paper
  • quart-sized Ziploc bag
  • microwave-safe bowl
  • mixing bowl
  • rubber spatula
  • infrared thermometer
  • offset spatula
  • teaspoon
  • 8 ounces premium milk chocolate
  • 100 grams puffed rice cereal
  1. Pour the puffed rice into a Ziploc bag, seal, and lightly massage between your hands to crush the cereal into smaller pieces. Sift in a strainer to remove gritty powder and then add to a mixing bowl and set aside.

  2. Chop the milk chocolate, setting 2 ounces aside for later. In a microwave-safe bowl, melt the remaining chocolate in the microwave in 30-second increments until the temperature reads 113 ℉. Add the reserved 2 ounces of unmelted chocolate and slowly fold in until fully melted. Continue folding the chocolate until the temperature reaches 80 ℉. Microwave for another 5-10 seconds, until the temperature reads between 87-89 ℉.

  3. Use a tablespoon to drizzle the tempered chocolate over the crushed rice cereal, stirring in between each addition to gauge the level of coverage. Repeat until the cereal is no longer visible through the chocolate.

  4. Spread the chocolate cereal mixture over a prepared baking sheet and chill in the fridge for 15 minutes. Remove the fridge and let stand until fully set. Break the chocolate cereal mass into bite-sized chunks and serve.

Snack
chocolate snacks

Filed Under: Chocolate Snacks

Chocolate Pretzel Bites

December 12, 2024 by Abigail Leave a Comment

Chocolate peanut butter pretzel bites on a platter at a party.

Your new favorite treat: chocolate caramel candies melted on crispy waffle pretzels and topped with peanut butter M&Ms. These pretzel bites are everything you want in a sweet and salty snack, and they come together in 60 seconds–seriously!

Chocolate peanut butter pretzel bites on a platter at a party.

Do you need a crowd-pleasing snack, S.T.A.T.? Then this recipe is dedicated to you, the ones whose homes have suddenly been overtaken by raucous middle-schoolers, or who need a midnight snack, in bulk, that hits all of the midnight craving food groups.

I guarantee you have all of these ingredients (or close substitutions, at a minimum) already stockpiled in your pantry. Made from three common pantry staples and with no occasion inconvenient enough to whip these up, what are you waiting for?

If these chocolate peanut butter pretzel bites look familiar, it’s because they are first-cousins with another chocolate and pretzel snack that I turned into Christmas Elf Hats (another 60-second recipe, should the need arise 😉 ).

Chocolate peanut butter pretzel bites on a baking sheet.

What Are Chocolate Peanut Butter Pretzel Bites?

A twist on the widely-popular combination of pretzels, Hershey’s kisses, and M&Ms, these positively addictive snacks amp up the flavor by using Rolos and peanut butter M&Ms for added caramel and peanut butter flavors. Plus, you get the perfect ratio of crispy, chewy, and creamy textures. In short: don’t even try to limit yourself or any family and friends–just enjoy the indulgence.

Why Chocolate Lovers Make This Recipe

  • Ready in 60 seconds — specifically using the microwave for this recipe enables you to make an entire batch in just one minute. Need I say more?
  • A multitude of flavors — while not the most sophisticated recipe, I certainly don’t need to be coaxed into an effortless way of enjoying salted caramel, peanut butter, and chocolate all in one bite.
  • Requires minimal ingredients — I bet these ingredients are already in your regular snack rotation. If not, fear not, for they can all be found in adjacent aisles in your local grocery store.
  • An instant hit with guests — from personal experience, I encourage you to whip up a few batches as your guests quickly break their promise of having, “just one more”.

Ingredients and Variations

Ingredients for chocolate pretzel bites.

Salted waffle pretzels — using the waffle shape creates a large enough foundation for the Rolo to sit on, without getting too messy after they melt.

Rolos — both milk or dark chocolate varieties work wonderfully in this recipe, and the caramel adds extra complexity to this deceitfully simple snack.

Peanut butter M&Ms — picture biting into a creamy peanut butter center atop a chocolate caramel pretzel. Mhm, I know. But if peanut butter isn’t your jam (uh-huh, I own it, I’ll own that pun), you can swap it with other types of M&Ms or another favorite chocolate candy.

Tips for Success

  1. Don’t microwave the Rolos for any shorter or longer than 25 seconds. Any shorter, and the Rolos won’t melt enough. Too long, and the caramel explodes in a blistering mess. And after not one but two fires from the burnt caramel, I made this a mandatory rule so you avoid the same smoldering fate.
  2. If the caramel does leak out, keep your fingers FAR away from it, since hot caramel will scald your skin and be too sticky to remove quickly.

Storage Instructions

Store leftovers in an airtight container in a cool, dry place for up to 2 weeks.

Chocolate Peanut Butter Pretzel Bites

Your new favorite treat! Chocolate caramel candies melted on crispy waffle pretzels and topped with peanut butter M&Ms. These pretzel bites are everything you want in a sweet and salty snack, and they come together in 60 seconds–seriously!

  • large microwave-safe plate
  • 50 waffle pretzels
  • 50 milk or dark chocolate Rolos
  • 50 peanut butter M&Ms
  1. Working in batches, place as many pretzels on a microwave-safe plate as you can. Put one Rolo in the center of each pretzel, and microwave for 25 seconds. Put the M&M in the indentation and slowly press down to desired height. Chill for 30 minutes, or until fully set.

Snack
chocolate pretzels, chocolate snacks

Filed Under: Chocolate Snacks

Reindeer Chow

December 11, 2024 by Abigail Leave a Comment

A moody shot of reindeer chow in a festive tin.

The perfect holiday snack for all ages! Crisp rice Chex cereal coated with premium milk chocolate and creamy peanut butter, then doused in powdered sugar and topped with mini pretzels and M&Ms that comes together in just 15 minutes!

A moody shot of reindeer chow in a festive tin.

Introducing someone to the revelation that is Muddy Buddies (a.k.a., “puppy chow”) is a truly special experience. Watch as their perplexed expression converts to sheer joy as their tongue works through each delicious layer: the coolness of the powdered sugar, followed by the sweetness of the chocolate, and finally finished with the nuttiness from the peanut butter.

This recipe is the definition of easy. It will take you all of 15 minutes from start to finish (even in bulk quantities), can be made days ahead of time, and neatly stores in the fridge for about one week. What other dish could possibly fit better into your busy holiday schedule?

Another one of this recipe’s strengths lends to its utilization of real, premium chocolate, instead of melting chocolate chips like in most other recipes. Chocolate chips are made specifically to hold their shape and thus do not contain any cocoa butter.

In contrast, using a premium chocolate bar or baker’s bar that actually contains cocoa butter results in a silkier, more even coating. Using a premium bar also guarantees a superior chocolate flavor than if you were to use chips or melting wafers.

With the cereal prepared, now comes the tantalizing process of selecting the various toppings. For best results, choose those that compliment the salty-sweet combination already provided by the coated Chex mix. This combination is such a smash hit with nearly every person’s palette that these will positively vanish early into your next holiday get-together!

Reindeer chow with a green napkin and red mug of tea in the background.

What is Reindeer Chow?

This recipe is a holiday-themed version of Muddy Buddies, a.k.a. “puppy chow”. Reindeer Chow is rice Chex coated in a blend of chocolate and peanut butter and rolled in powdered sugar. Reindeer Chow supports many sweet and salty toppings combinations — this recipe uses mini pretzels and Holiday Blend M&Ms for the perfect holiday party snack!

Reasons Why Chocolate Lovers Make This Recipe

  • Great for all ages — whether you serve this at your child’s holiday class party or a festive get-together with friends or family, watch everyone’s eyes light up when you pop the lid!
  • Nostalgic snack — for me, this recipe brings back fond memories of making sugar cookies and chocolaty snacks with school friends over winter break.
  • Feed a crowd in minutes — seriously, this recipe is so simple, requires minimal ingredients, and requires NO baking or chill times. Go from prepping to plated or packaged in minutes!

Ingredients

You can easily find all of these ingredients at your local grocery store around the holidays, including:

Ingredients for reindeer chow.

Rice Chex cereal — I specifically chose the rice variety for its milder flavor that would allow for the chocolate and peanut butter to shine through.

Premium milk or dark chocolate — rather than using melted chocolate chips like most recipes, I use premium chocolate so that the cocoa butter helps coat the Chex pieces.

Creamy peanut butter — don’t use crunchy peanut butter in this recipe since this will greatly impact the overall texture of the final product. Additionally, I don’t recommend using all-natural peanut butter due to the higher oil content.

Powdered sugar — adds a layer of sweetness and a cool sensation on the tongue.

Mini pretzels — pretzels provide the main source of salt in this recipe while exacting a more distinctive crunch! that contrasts the pillowy bite of the coated Chex.

Holiday M&Ms — while not an exact requirement, using only red and green M&Ms provides a festive presentation. I find that including a solid chocolate candy like these helps balance the chocolate-to-peanut-butter ratio.

Bright picture of reindeer chow in a festive tin.

Tips for Success

  1. Drizzle the chocolate mixture over the cereal in stages. If you pour it on all at once, you risk having an uneven coating.
  2. For best results, I recommend using a kitchen scale to weigh the main ingredients of this recipe, excluding toppings. Relying solely on cup measurements can accidentally throw off the ratios and create a final product that is either too dry, too wet, or sparsely coated.
  3. Conversely to the above tip, I prefer to eyeball how many of each topping I want to incorporate, depending on the flavor profile I am trying to achieve. For those wanting a bit more salty contrast, include more pretzels, or experiment with different types of salted nuts for an even crunchier bite.

Storage and Reheating Instructions

Store this recipe in an airtight container and keep chilled in the fridge for up to 1 week. Remove from the fridge and allow to sit at room temperature for about 10 minutes before serving.

Reindeer Chow

The perfect holiday snack for all ages! Crisp rice Chex cereal coated with premium milk chocolate and creamy peanut butter, then doused in powdered sugar and topped with mini pretzels and M&Ms that comes together in just 15 minutes!

  • kitchen scale
  • medium-sized mixing bowl
  • microwave-safe bowl
  • rubber spatula
  • gallon-sized resealable bag
  • baking sheet
  • sheet parchment paper
  • 174 grams Rice Chex cereal
  • 8 ounces premium chocolate
  • 4 ounces creamy peanut butter
  • 400 grams powdered sugar
  • mini pretzels
  • Holiday M&Ms
  1. Add the Chex to a medium-sized mixing bowl.

  2. In a separate, microwave-safe bowl, melt the chocolate in 30-second intervals in the microwave, stirring in between until fully liquid.

  3. Stir in the peanut butter until fully incorporated.

  4. Drizzle the chocolate mixture over the Chex a bit at a time, stirring lightly in between to evenly coat each piece before adding the next coat. Repeat until the chocolate mixture is completely used up and the cereal is thoroughly and evenly coated.

  5. Scoop the coated cereal into a gallon-sized resealable bag and top with powdered sugar. Seal the bag and shake it back and forth to evenly distribute the powdered sugar throughout the bag.

  6. Line a baking sheet with parchment paper and pour the freshly-dusted cereal out onto the tray. Apply more powdered sugar to any bare spots and toss to coat. Add in the desired amount of pretzels and M&Ms, and toss to evenly distribute.

  7. Serve either directly from the tray or scoop into holiday tins for a party or to make great gifts!

Filed Under: Chocolate Snacks

Copyright © 2026 · Foodie Pro 5 on Genesis Framework · WordPress · Log in